How to Root Samsung Galaxy Tab 2 7.0 GT-P3100


Samsung Galaxy Tab 2 7.0 GT-P3100 is such a great tablet on the market so far. It seems that Samsung have taken it upon themselves on literally making a tablet for everyone. With all of the Galaxy Tab variants out there, the Galaxy Tab 2 7.0 it seems like systematic attempt by Samsung to put a unique tablet variant in the hands of every living person on the planet.

Caution: In my experience nothing has ever gone wrong with rooting. There is always that slight chance something can mess up. Use caution and only do this if you want to. I am not responsible if anything happens (but I really don’t think anything will happen if you do everything right)  Also rooting voids your warranty but don’t worry, unrooting should give it back like nothing ever happened.!! Please read about Rooting here.

Note:
  • The instructions in this guide are intended for use with the Samsung Galaxy Tab 2 7.0 GT-P3100. Applying these instructions on another device or model may produce undesired outcomes.
  • The information in this guide is provided for instructional and educational purposes only. There is no guarantee that these instructions will work under your specific and unique circumstances.
  • Use these instructions at your own risk. We shall not hold any responsibility or liability for whatever happens to you or your device arising from your use of the info in this guide.
  • Read and understand the whole guide first before actually performing the instructions.
  • This Procedure works for Mobiles having stock ROM only, and will definitely void your warranty, although the warranty can be claimed by un-rooting your device.

What you need to prepare:
  • Samsung Galaxy Galaxy Tab 2 7.0 GT-P3100 and a PC
  • Backup all personal data on your phone to make sure you have a copy of your personal data (e.g., contacts, SMS, MMS, Internet settings, Wi-Fi passwords, and the like) in case the procedure in this guide erases such data. Guide from here
  • Make sure your device has at least 75% of phone battery charge.
  • Download ODIN for windows
  • Download recovery.tar.md5
  • Download rooting file for Galaxy Tab 2, CWM-root-gtab2.zip, and copy those file to extSDcard (open windows explorer and you`ll find it if only Galaxy Tab2 still connect) 

Steps to Root Galaxy Tab 2 7.0 GT-P3100
  • Close KIES Application if any.
  • Now at your Tab, Go to menu > settings > application > development
  • Check on USB Debugging Option
  • Turn off the device
  • Press and Hold Power + Volume [-] buttons until Samsung Galaxy Tab2 boot in to Download Mode
  • Open ODIN, wait until ODIN detect the device. It`s show with green at GTab2 Port.
  • click PDA button, find and select recovery.tar.md5
  • Click Start button and wait until Gtab2 reboot
  • Take a change when it`s reboot to turn off the device
  • Remove Samsung galaxy Tab 2 from PC/laptop
  • Press and hold Power + Volume[+] Buttons and boot in to recovery mode
  • Optional Step, do backup with select Backup and Restore, it`s took time so be patience
  • At CWM menu, select Install zip from SDcard
  • Select Choose Zip from SDcard
  • Find and select cwm-root-gtab2.zip
  • Wait until the process is done and reboot
  • If you find a superuser icon in application mean your root is success.
  • Done

How to Root Samsung Galaxy Note 10.1 GT-N8000


Samsung Galaxy Note 10.1 GT-N8000 is indeed one of the best tablets on the market today. The another version of Note, this is presented in wide screen of 10" inch to make more amazing screen. On this article i will explain how to root  Samsung Galaxy Note 10.1 GT-N8000 so you can access more on your device.

Caution: In my experience nothing has ever gone wrong with rooting. There is always that slight chance something can mess up. Use caution and only do this if you want to. I am not responsible if anything happens (but I really don’t think anything will happen if you do everything right)  Also rooting voids your warranty but don’t worry, unrooting should give it back like nothing ever happened.!! Please read about Rooting here.

Note:
  • The instructions in this guide are intended for use with the Samsung Galaxy Note 10.1 GT-N8000. Applying these instructions on another device or model may produce undesired outcomes.
  • The information in this guide is provided for instructional and educational purposes only. There is no guarantee that these instructions will work under your specific and unique circumstances.
  • Use these instructions at your own risk. We shall not hold any responsibility or liability for whatever happens to you or your device arising from your use of the info in this guide.
  • Read and understand the whole guide first before actually performing the instructions.
  • This Procedure works for Mobiles having stock ROM only, and will definitely void your warranty, although the warranty can be claimed by un-rooting your device.

What you need to prepare:
  • Samsung Galaxy Note 10.1 GT-N8000 and a PC
  • Backup all personal data on your phone to make sure you have a copy of your personal data (e.g., contacts, SMS, MMS, Internet settings, Wi-Fi passwords, and the like) in case the procedure in this guide erases such data. Guide from here
  • Make sure your device has at least 75% of phone battery charge.
  • Installed ClockWorkMod Recovery here.
  • Download CWM-SuperSU-v0.94.zip 

Steps to Root Galaxy Note 10.1 :
  • Copy CWM-SuperSU-v0.94.zip to SDcard
  • Press and hold power + volume[+] buttons until device reboot
  • When Samsung Galaxy note appear, release power button (but still hold volume[+] button), device will boot in recovery mode(CWM)
  • Choose “Install zip from SDcard“
  • Select “Choose zip from SDcard“
  • Find and select CWM-SuperSU-v0.94.zip
  • Wait until rooting process done
  • Reboot Galaxy Note 10.1
  • Done

Note:
At Cwm menu, touchsceen also can use for navigate and select. But to minimize wrong selection use volume[+] and volume[-] for up and down, power button for enter

How to Install ClockWorkMod Recovery in Samsung Galaxy Note 10.1 GT-N8000


In this article i will explain about the tutorial of install the ClockWorkMod Recovery in Samsung Galaxy Note 10.1 GT-N8000, so you can root your device using this recovery. Below are some files you need to download and some steps you need to follow carefully in order to avoid unwanted things.

Download Support File’s

Install CWM recovery in Galaxy Note 10.1 using Odin
  • Go to settings > Development
  • Check Usb debugging
  • Connect Galaxy Note 10.1 to PC / Laptop
  • Copy CWM-SuperSU-v0.94.zip to SDcard
  • Press and hold power + volume[-] buttons until warning message come up
  • Press volume[+] to boot in download mode
  • Run Odin
  • Wait until Odin detect the device
  • Click PDA button, find and select HighOnAndroidCWMRecoveryGTN8000.tar
  • Click ‘Start’ button to begin flashing process
  • Wait until all process in Odin done
  • Device will automatically reboot
  • Remove Galaxy note 10.1 from PC/Laptop
  • Done
Note: 
At first time odin detect the device, you’ll see a field become yellow. After Odin done with flashing the field become green.

[Tutorial] How to Root and UnRoot Samsung Galaxy Pocket S5300 in Easy Way


Samsung Galaxy Pocket S5300 is the cheapest Android phone made by Samsung. It feels like having such its brother Samsung Galaxy Young, but this Galaxy Pocket has other main different such as the OS put on it. Anyway, here is not about the privew but we gonna root this phone so you guys have the access to gain more functionality on your Galay Pocket.

Caution: In my experience nothing has ever gone wrong with rooting. There is always that slight chance something can mess up. Use caution and only do this if you want to. I am not responsible if anything happens (but I really don’t think anything will happen if you do everything right)  Also rooting voids your warranty but don’t worry, unrooting should give it back like nothing ever happened.!! Please read about Rooting here.

Note:
  • The instructions in this guide are intended for use with the Samsung Galaxy Pocket S5300. Applying these instructions on another device or model may produce undesired outcomes.
  • The information in this guide is provided for instructional and educational purposes only. There is no guarantee that these instructions will work under your specific and unique circumstances.
  • Use these instructions at your own risk. We shall not hold any responsibility or liability for whatever happens to you or your device arising from your use of the info in this guide.
  • Read and understand the whole guide first before actually performing the instructions.
  • This Procedure works for Mobiles having stock ROM only, and will definitely void your warranty, although the warranty can be claimed by un-rooting your device.


What you need to prepare:

  • Samsung Galaxy Pocket S5300 and a PC
  • Backup all personal data on your phone to make sure you have a copy of your personal data (e.g., contacts, SMS, MMS, Internet settings, Wi-Fi passwords, and the like) in case the procedure in this guide erases such data. Guide from here
  • Make sure your device has at least 75% of phone battery charge.
  • Download the file Update.zip here.

Steps to Root Samsung Galaxy Pocket S5300:
  • Copy update.zip to SDcard and place it in /root
  • Turn off the device
  • Press and hold Home + Power + Volume[+] buttons until it` boot in recovery mode
  • Choose applay update from SDcard
  • Select update.zip
  • Select reboot now
  • Reboot in normal mode
  • Check in Application, if Galaxy Pocket is rooted then it should be Superuser icon in there.

Congratulations! Now your Samsung Galaxy Pocket has been rooted. Enjoy the full functionality of rooted device. Give us some feedback if you have succeded or something goes wrong in the comment section below.

How to Unroot Galaxy Pocket

All step to unroot is almost same with root procedure, just download unroot.zip then rename it become update.zip. If update.zip from root proccess still in SDcard, just overwrite it.

Samsung Galaxy S IV Should Be Like This [Hot Rumor]


Apparently there are many rumors said that the next monster phone made by Samsung which is also the successor of Galaxy S series will not come out in the next year. But many people hope that Samsung Galaxy S IV will be released in the last 2013. This is planned in order to give space for the current flagship phone Samsung Galaxy S III to reach worldwide and make the owners satisfied.

But rumor is still rumor. The truth lies on the Samsung's hand wether they will release the next flagship phone in the early year of 2013 or not is still unknown. But one thing for sure, the specs that will be put on the the next flagship will also be must amazing sure enough.


Even it’s still likely months until we see the Samsung Galaxy S IV, but talk about it has already started and once that ball starts rolling it’s hard to stop it. This time, we have a wishful concept for the next Galaxy S Android flagship and it’s a looker.

Some of the features like an even lighter and slimmer body seem possible, others like the laser-projected keyboard we’re plain tired of seeing - it’s not going to happen, folks.

Before we start commenting, though, you’d better first take a look at the specs and the beautifully produced concept video below. Here are the wishful specs for this S IV specs:


Specification:
  • Android 4.2 Jelly Bean Touchwiz
  • 5 inch 1080p Full HD Super Amoled + Display
  • 2.0 Ghz A15 Exynos 5450 Quad CPU
  • ARM Mali T658 GPU
  • 13 MP Rear with 2 MP Front Facing Camera
  • Standard Battery Li-Ion 3100 mAh Battery
  • 16/32/64 GB Internal memory options
  • Removable SD Card Slot Up to 64 GB
  • Corning Gorilla Glass 3
  • 2 GB DDR3 RAM
  • 4G LTE Connectivity
  • Multi Purpose/Dedicated Camera Button
  • Bluetooth 5.0
  • Front Speakers
The only thing that seems like a lock is the 1080p display. Looking at all other manufacturers, it almost seems like a sure fact that Samsung will also have to use a 5-inch 1080p display to be relevant.

A Samsung Exynos 5 processor also is almost certain to be inside the handset, and we’d bet on a quad-core version, if only because of the buzz word that quad-core has become. 2.0GHz, though? We doubt it as it’d be too much of a hit on the battery.

And when it comes to the camera sensor, having a 13-megapixel one definitely won’t solve anyone’s problems, what matters is the quality of the camera.

With all that, we have to admit that the concept is really beautifully made and it’s worth a look, if just for that. What are your wishes and expectations for the Samsung Galaxy S IV?

Make Your Mobile Phone Secure with Insurance ? Is It Worth ?


Today, we may be safe walking on the street bringing our daily phone everywhere because of job makes us with. Sometime we need to consider about how if someone stole our phone, With mobile phone theft soaring, should you add yours to your household insurance or go for standalone cover? We scan the market for the best policies.

For many years Guardian Money has warned of the pitfalls of buying mobile phone insurance, which can be pricey and often has more get-outs than an escape artist.

Claims can be turned down for any number of reasons – such as if you fail to report the loss within 24 hours, or if the theft in the street was not accompanied by an actual threat of physical violence. Phones taken from schools or from public spaces, often including public transport, are rarely covered … and so on.

This led us to conclude in the past that mobile phone insurance wasn't worth the money, especially when handset costs weren't that high.

However, with the latest smartphones – particularly Apple iPhones – now costing around £600 to replace, we have had to reassess. A quick look on internet chatrooms shows there is huge interest in finding a cheap way to insure smartphones, but no one appears to have come up with a stand-out policy.

The simplest way to cover a handset is to buy your phone network's own policy. But these can be very expensive. Buy an iPhone 4S from Vodafone, and its Cover Me insurance costs £12.99 a month, or almost £312 over a two-year contract. Orange charges a similar £12 a month.

A cheaper option is to buy cover from one of the plethora of firms now offering to insure smartphones. Away from the big-name retailers, two of the best-known are Foneguard and TalkCover, and they offer insurance from £5.33 and £6.66 a month respectively for iPhones. Again there are plenty of exclusions, and in the case of TalkCover, there's an excess of £100 for an iPhone claim.

Undoubtedly the cheapest option is to add the phone to your home insurance, usually as a "possessions outside the home" extra. This could cost as little as £30 a year, and there will be other benefits.

You need to check the excess on the policy – again, it could be £100. However, you should weigh up how likely you are to claim. Contents insurance now gives significant no-claims discounts, meaning your premium could shoot up if you make a claim. You may take the view that you would rather not have your iPhone tangled up with your home insurance.

The best option we have found is Barclaycard's Gadget Insurance. You don't need to be a card carrier to insure the latest iPhone for £5.99 a month, or just under £72 a year. A BlackBerry costs £1.49 a month, and an iPad, £4.88. There's a £50 excess for iPhones, other smartphones and iPads, and while the policy has several notable caveats, it isn't quite as full of exclusions as some. It includes accidental damage. As with any policy, make sure you go through the small print.

If you have had a good or bad experience with Barclaycard's insurance or think there's a better policy out there, email money@guardian.co.uk

Lastly, follow these simple precautions to reduce the risk of becoming a victim of theft:

• Watch out for people on bikes and mopeds, and don't use your phone if someone could whizz by and grab it.

• Don't check your phone as soon as you leave a tube or train station – leave it a while, or walk into a shop.

• Don't text and walk – you will be less aware of what is happening around you.

• If you're talking outside, stand with your back against a wall so no one can come up behind you.

• Register your phone and other property at immobilise.com – it can help recover your property and capture thieves. You will need your phone's IMEI (International Mobile Equipment Identity) number, which you can find by typing *#06# into your phone.

Source Guardian

How to Root Haipai Noble X710D MTK6577 Android 4.0 Ice Cream Sandwich [Tutorial]


Last time we have explained a tutorial about rooting Haipai Noble i9220 MTK6575, now it is time to root its sibling which is Haipai Noble X710D MTK6577 that running Android 4.0 Ice Cream Sandwich. Of course this is done in order to access the devices freely just like running games or apps. On this post i will explain about how to root Haipai Noble i9220 with Android 4.0 Ice Cream Sandwich step by step, so you can follow the instruction below carefully.

Caution: In my experience nothing has ever gone wrong with rooting. There is always that slight chance something can mess up. Use caution and only do this if you want to. I am not responsible if anything happens (but I really don’t think anything will happen if you do everything right)  Also rooting voids your warranty but don’t worry, unrooting should give it back like nothing ever happened.!! Please read about Rooting here.

Note:
  • The instructions in this guide are intended for use with the Haipai Noble X710D MTK6577. Applying these instructions on another device or model may produce undesired outcomes.
  • The information in this guide is provided for instructional and educational purposes only. There is no guarantee that these instructions will work under your specific and unique circumstances.
  • Use these instructions at your own risk. We shall not hold any responsibility or liability for whatever happens to you or your device arising from your use of the info in this guide.
  • Read and understand the whole guide first before actually performing the instructions.
  • This Procedure works for Mobiles having stock ROM only, and will definitely void your warranty, although the warranty can be claimed by un-rooting your device.

What you need to prepare:
  • Haipai Noble X710D MTK6577 and a PC
  • Backup all personal data on your phone to make sure you have a copy of your personal data (e.g., contacts, SMS, MMS, Internet settings, Wi-Fi passwords, and the like) in case the procedure in this guide erases such data. Guide from here
  • Make sure your device has at least 75% of phone battery charge.
  • Download this file here.

Steps to root Haipai Noble X710D MTK6577:
  • Extract 'Android flash' anywhere to your desktop
  • Open the folder within called 'USB VCOM Driver' and chose the folder then file that is your operating system (the .inf) and paste it to your desktop
  • Pull the battery out of your phone and connect the phone to you computer whilst holding the volume up button
  • Open device manager. You should see your phone (it re-appeared every 5 seconds for me). Right click on your phone and press update driver, then browse manually for the .inf file you put on your desktop. Once you've done that disconnect your phone
  • Open 'Android flash' and open Flash_tool and select all the files to make it look like the picture below
  • Press download, then plug in your phone whilst pressing volume up button
  • Done! You now have CWM and have rooted your phone! There are also some other apps that are added too

If you are having issues with your IMEI code read this  There's also a issue with external sd cards which is currently being worked on. (phone can't write to sd card. if you attempt, phone reports sd card as damaged and sd card will need to be re-formatted)

How To Unlock Bootloader On The Verizon Samsung Galaxy Note II N7100 [Tutorial]


We can't deny that Samsung Galaxy Note II N7100 is the monster of the phablet today. We can see by the huge demand of the device worldwide. This seems make Samsung can be proud itself to create such an amazing device as the successor of the Note I N700. However, for those who seems can't satisfied their self to use provides's device, this is the tutorial ho to unlock boodloader on the Verizon Samsung Galaxy Note II N7100.

Although Verizon is known for its hard-to-break bootloader on its devices, talented minds of the Android development community are simply good enough to find other ways to get it unlocked. That got proved for one more time when XDA members AdamOutler, Ralekdev and Rebellos teamed up and unlocked Verizon Samsung Galaxy Note 2 (SCH-i605) bootloader.

The team of developers uploaded a video tutorial explaining step-by-step the process to unlock Verizon Galaxy Note 2 bootloader. They also showed how to install TWRP recovery to flash ROM as well as other advanced recovery related tasks.

The process involves flashing Revision ROM as an Odin package, running cross platform CASUAL script and then again flashing a custom bootloader and TWRP recovery using Odin. The users must note that they are required to boot back into ROM since they won’t get LTE back until CASUAL completes and confirms the unlock.

The users have to use Odin twice and both the time they require a PIT file along with flashable TAR file.

Below is the tutorial to unlock the bootloader on the Verizon Samsung Galaxy Note 2. But there are some vital aspects to consider before that:

Note:

- Don’t use this tutorial on any other device except on Verizon Galaxy Note 2 SCH-i605.

- Do not flash anything with a sboot.bin after completing this process. This may either relock your device or render it inoperable.

- The users must note that IBTimes will not be held responsible for anything that goes wrong. They should proceed at their own risk.

Files Needed :

- Revision ROM Odin Package

- CASUAL Exploit

- Insecure Bootloaders

- Pit Tool for use in every Odin flash

- Odin 3.07


Steps To Follow :

Step 1: Install the PIT file & Revision ROM Odin Package

Step 2: Run the CASUAL Exploit

Step 3: Hit the reset button in Odin

Step 4: Install the PIT file and Suck It Verizon Insecure Bootloader+Recovery

Check out the video below:


[Source: XDA Developers / Android Jinn]

BlackBerry N-Series QWERTY Shows Up Without Navigation and Menu Buttons


Here comes another live photos of the new blackberry phones. The one in which will be released in full touch screen and another one will be released in QWERTY keyboard.

Only a few days after its touchscreen sibling made a couple of appearances, RIM's BlackBerry N-Series smartphone emerged in a duo of live photos. The soon to be revealed BlackBerry 10 smartphone packs a hardware QWERTY keyboard in addition to its capacitive touchscreen.


As you can see in the photos above, the BlackBerry N-Series looks a lot like the currently offered Bold 9900, save for the lack of navigation and menu buttons, which have given way to a larger screen. The QWERTY appears to be unsurprisingly well-made and comfortable, so the BlackBerry purists should have a good reason to look forward to the device.

The BlackBerry N-Series is all but certain to launch alongside the BlackBerry Z10 on January 30 in New York City. We will update you should we hear more about the upcoming device. So let't wait for the price then.

Source

Huawei Ascend Mate Reveals 6.1" Quad-Core Android with a 1080p Resolution


Currently, another call from Android devices sounded from Chinese manufacturer. Richard Yu Huawei Chairman of devices showed off the Ascend Mate - a 6.1" quad-core Android smartphone with a 1080p resolution At a Huawei store in Guangzhou, China.

The device is said to be powered by a quad-core K3V3 chip clocked at 1.8 GHz, and offer a 4000 mAh battery, 9.9 mm frame and a screen with the impressive 361 ppi density. Richard Yu shared that the display is of the LTPS type, meaning low temperature polysilicon.
 
Prior to Richard Yu's demonstration of the Ascend Mate Huawei's Senior Vice President Yu Chengdong confirmed the company is working on such a device.

The Ascend Mate should make an appearance at CES, alongside the 5" Ascend D2, and should cost around $480 (¥3000).
It remains to be seen what version of Android the Ascend Mate will be running but Jelly Bean is a safe bet.

So for those who want to get this phablet on their hands and try to use another big-screen phone should wait for a moment. Let's check it out from this video.

The Launching Date of Blackberry 10 has been Confirmed


This is a great news for the Blackberry fans out there. During these months after getting delayed, RIM's BlackBerry 10 platform finally has a launch date set. On January 30, RIM will hold multiple events across the world simultaneously where it will launch both the OS and the first the BlackBerry phones to use it.

The BB 10 OS will hit the ground running - it will launch with "a large catalog of the leading applications from across the globe and across all categories" and a FIPS 140-2 certification (which means that government agencies can switch to BB 10 right away and count on security). You can read more about FIPS 140-2 over here.

During the event, RIM will give details on the two launch phones and their availability. We've most likely seen them already - the touchscreen operated L-series and the more traditional QWERTY-packing N-Series. Then there's the rumored BlackBerry 10 Aristo device with a quad-core Krait and a 4.65" AMOLED 720p display.

RIM's press release didn’t say anything about the first two BlackBerry 10 phones, so the Aristo remains in the rumor mill for now, but the company did say that the phones are being tested by 50 carriers (with more on the way), pointing to a wide launch.

For me myself i can't wait to see the Blackberry 10's releasing as well. It seems pity to know that Blackberry is not active as other smartphone brand did.

iPhone 5S Trial Production is Planned on the Next Month


We all know that the best phone so far which is iPhone 5 just been released on the market. People are also still tasting the device on their hands not so long. But the news is already reached us that the next 5s is already begun to be on the trial production.

A story coming from the Commercial Times is suggesting that Apple have no intention of resting on their laurels when it comes to updating and upgrading their iPhone hardware and could be planning on initiating a trial production run of iPhone 5S handsets as early as next month. It seems nothing short of madness to suggest that the Cupertino based company could be even contemplating pushing out a new iPhone so soon after the successful release of the current model iPhone 5, but as far-fetched as the report may seem on the surface it does actually raise a few intriguing points that could add some fuel to this one. The publication is making reference to the fact that Apple have been facing low yield rates for certain components that are included in the iPhone 5 and could therefore take action to accelerate the launch of its successor.


Any devices that are born from a trial production run taking place toward the end of this year wouldn’t make it in the hands of the public, but it is also being speculated that should an initial trial prove successful, Apple could be looking to put the iPhone 5S into mass production in the first quarter of 2013. Apple’s current iPhone 5 is the sixth-generation smartphone to come from the fruit company, with all previous releases either following or going beyond a twelve month release schedule. Given previous release history it seems highly unlikely that we will be seeing a new iPhone in the next few months.

Until we hear anything additional or concrete from reliable and tested sources then I think it is safe to assume that the current iPhone 5 will see us through until at least September/October of 2013. However, when that time does arrive it will be extremely interesting to see whether or not Apple will go down the route of releasing a totally revamped handset or do actually make incremental updates and push out an iPhone 5S.

So, from this we can see as we wait for the 5s or buying this iPhone 5 in which we know that there are many things should be fixed inside the phone already.

(Via redmondpie)

How to Root Sony Xperia T running on Android 4.0 Ice Cream Sandwich [Tutorial]


Another Xperia series showing up to ready to be rooted. This time we will explain a tutorial about how to root Sony Xperia T which released with an official Android 4.0 Ice Cream Sandwich. Previously we have explained and posted the same tutorial for Xperia which is Sony Xperia S, now for those the owners of Sony Xperia T do not worry not to get the rooting guide.

Thanks to xda forum members who always try their best to make the Android OS looks better in its performance and customization. So, here we go please read this tutorial carefully. The choice between rooting or not lies on your hand.


Caution: In my experience nothing has ever gone wrong with rooting. There is always that slight chance something can mess up. Use caution and only do this if you want to. I am not responsible if anything happens (but I really don’t think anything will happen if you do everything right)  Also rooting voids your warranty but don’t worry, unrooting should give it back like nothing ever happened.!! Please read about Rooting here.

Note:
  • The instructions in this guide are intended for use with the Sony Xperia T running on Android 4.0 Ice Cream Sandwich. Applying these instructions on another device or model may produce undesired outcomes.
  • The information in this guide is provided for instructional and educational purposes only. There is no guarantee that these instructions will work under your specific and unique circumstances.
  • Use these instructions at your own risk. We shall not hold any responsibility or liability for whatever happens to you or your device arising from your use of the info in this guide.
  • Read and understand the whole guide first before actually performing the instructions.
  • This Procedure will definitely void your warranty, although the warranty can be claimed by un-rooting your device.


What you need to prepare:
  • A Sony Xperia T running on Android 4.0 Ice Cream Sandwich and a PC
  • Backup all personal data on your phone to make sure you have a copy of your personal data (e.g., contacts, SMS, MMS, Internet settings, Wi-Fi passwords, and the like) in case the procedure in this guide erases such data. Guide from here
  • Make sure your device has at least 75% of phone battery charge.


How to root using Bin4ry’s Root Tool
  • Download the tool from here.
  • Extract the downloaded zip file to a convenient location on the computer.
  • Ensure that you are running an Android 4.0 or Android 4.1 ROM on your device. This will not work on Android 2.3 or older versions of Android.
  • Make sure drivers for your Android device are installed on the computer. Drivers for most devices can be installed by installing the manufacturer’s PC suite software.
  • On your phone/tablet, enable USB debugging in the Settings » Developer options menu.
  • Run the tool by double-clicking the RunMe.bat file from the folder where you extracted the tool in step 2.
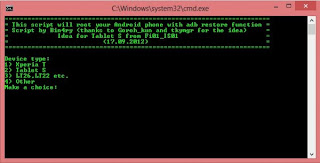
  • Then, make the correct choice according to whatever device you have (enter 4 for the normal method which is to be used for all non-Sony devices), then press Enter.
  • Connect your device to the computer. Then, follow on-screen instructions to root your device.

Congratulation ! now your Sony Xperia T has been rooted. Enjoy the advantages of the rooted device. Please give us a feedback on the comment section below.

How to Root Sony Xperia S running on Android 4.0 Ice Cream Sandwich [Tutorial]


Sony Xperia S is one of the best smartphones on the market so far. It is released with the official Android 2.3 Gingerbread, but lately it is planed to updagre to Android 4.0 Ice Cream Sandwich. For those who have Sony Xperia S running on Android 4.0 Ice Cream Sandwich and want to root their device, on this article i will show you how to root the Sony Xperia S using one amazing tool called Bin4ry's root tool.

Thanks to xda forum members who always try their best to make the Android OS looks better in its performance and customization. So, here we go please read this tutorial carefully. The choice between rooting or not lies on your hand.


Caution: In my experience nothing has ever gone wrong with rooting. There is always that slight chance something can mess up. Use caution and only do this if you want to. I am not responsible if anything happens (but I really don’t think anything will happen if you do everything right)  Also rooting voids your warranty but don’t worry, unrooting should give it back like nothing ever happened.!! Please read about Rooting here.

Note:
  • The instructions in this guide are intended for use with the Sony Xperia S running on Android 4.0 Ice Cream Sandwich. Applying these instructions on another device or model may produce undesired outcomes.
  • The information in this guide is provided for instructional and educational purposes only. There is no guarantee that these instructions will work under your specific and unique circumstances.
  • Use these instructions at your own risk. We shall not hold any responsibility or liability for whatever happens to you or your device arising from your use of the info in this guide.
  • Read and understand the whole guide first before actually performing the instructions.
  • This Procedure will definitely void your warranty, although the warranty can be claimed by un-rooting your device.


What you need to prepare:
  • A Sony Xperia S running on Android 4.0 Ice Cream Sandwich and a PC
  • Backup all personal data on your phone to make sure you have a copy of your personal data (e.g., contacts, SMS, MMS, Internet settings, Wi-Fi passwords, and the like) in case the procedure in this guide erases such data. Guide from here
  • Make sure your device has at least 75% of phone battery charge.


How to root using Bin4ry’s Root Tool
  • Download the tool from here.
  • Extract the downloaded zip file to a convenient location on the computer.
  • Ensure that you are running an Android 4.0 or Android 4.1 ROM on your device. This will not work on Android 2.3 or older versions of Android.
  • Make sure drivers for your Android device are installed on the computer. Drivers for most devices can be installed by installing the manufacturer’s PC suite software.
  • On your phone/tablet, enable USB debugging in the Settings » Developer options menu.
  • Run the tool by double-clicking the RunMe.bat file from the folder where you extracted the tool in step 2.
  • Then, make the correct choice according to whatever device you have (enter 4 for the normal method which is to be used for all non-Sony devices), then press Enter.
  • Connect your device to the computer. Then, follow on-screen instructions to root your device.

Congratulation ! now your Sony Xperia S has been rooted. Enjoy the advantages of the rooted device. Please give us a feedback on the comment section below.

Intel Seems Working on Future Mobile Devices Using 48-Core Processors


Nokia only recently claimed single -ore processors were all that was needed to power today’s smartphones, though thanks to market pressure, compromised in bringing a dual-core chip to the Lumia 920. Look at the entire smartphone and tablet market, and you’ll notice each vendor is following a similar motif in adding more cores as a form of natural progression. However, if you thought the Galaxy S III was a bit of a powerhouse with its quad-core Exynos processor, wait until you get a load of what Intel is cooking up.

The company, which is by far the foremost manufacturer of processors in the world of computing, is looking to build an incredible 48-core processor for smartphones and tablets. Considering the speed of the iPhone 5, for example, which runs on a dual-core A6 chip, a 48 core chip should be one notch slower than telepathy, right?


Well in actual fact, while the core count is certainly a useful component in determining the overall speed of a device, it’s certainly not the end-all, be-all. In a similar manner to which the number of megapixels is used to monopolize smartphone cameras, many consumers are led to believe that a device with more cores than another is, by and large, a more efficient one.

Cores serve to chop up big tasks into digestible chunks, so the more cores you have, the more chunks can be dealt with without lagging up the device. Thus, if you have 48 cores, than number of complicated tasks could occur at the same time. Before you all get excited, though, the experts have already waded in and insisted the technology is a decade off reaching our prized mobile assets.


Undeterred by the claims of a ten-year wait, however, Intel’s chief technology officer believes 48-core processors could make an appearance long before then, and seems pretty enthusiastic about his company’s progress. Speaking with Computerworld, he noted:

I think the desire to move to more natural interfaces to make the interaction much more human-like is really going to drive the computational requirements. Having large numbers of cores to generate very high performance levels is the most energy efficient way to deliver those performance levels.

Suddenly, my dual-core smartphone feels decidedly slow.

You can follow us on Twitter, add us to your circle on Google+ or like our Facebook page to keep yourself updated on all the latest from Microsoft, Google, Apple and the web.

Source

How to Unlocking Bootloader on Sony Ericsson X10 Mini Using SE Tweaker Tool (Tutorial)


Previously we have been posted the tutorial about how to unlocking bootloader on Sony Ericsson X8 here, and Sony Ericsson W8 here, now i will explain the tutorial about unlocking bootloader on Sony Ericsson X10 Mini. This tutorial also uses same methods as before in which using SE Tweaker Tool.

SE Tweaker Tool is a Tool + Guide to make some tweaks to ur phone With ease which includes of all the necessary utilities for many devices. Unlocking the bootloader of your phone will restore the original sim lock of your phone (if you had any) unless if you unlocked with EMMA/IMEI unlock code or it was factory-unlocked or if SE unlocked it! However, some users have reported that using msm7227_semc.cmd on their sim-unlocked phones did not restore the sim lock onto their phone.

Read this before doing Unlocking Bootloader

NOTE: Dealing with the bootloader is highly dangerous and can result in a hard brick if you don't follow the proper instructions. Then, you will have to go and repair your phone by sending it to SE. I am not responsible if your phone dies on you because you didn't follow instructions or you screwed up somehow. Unlock the bootloader on your sim unlocked phone AT YOUR OWN RISK!

Only For people getting error related iscoolbutton.ocx.. Just Run the ocx_fix.bat in the downloaded tool and then Run the SE Tweaker Tool..

Requirements: 
  • Rooted phone, Sony Ericsson PC Companion installed in PC, Courage
  • You do not need to have a sim lock on your phone to unlock your Bootloader.

Recommended:
  • Disable your Antivirus (it might find a "virus" in ADB.exe even though there isn't one and might even interfere in bootloader unlocking process) 
  • USB debugging enabled.

Download the files needed for the unlock.
  • Download Flashtool (needed for S1tool to work properly and for loading custom kernels next time) and install it (not necessary if you already have Flashtool):
  • Download and install Flashtool v0.5.3 here (follow instructions on the website).
  • After installing it, open the flashtool folder and open the drivers folder inside that. Double click on the ggsetup-2.2.0.11.exe file inside and install Gordon's Gate.
  • Then restart your computer. if you dont Find GORDAN'S gate.exe in the drivers folder download it from my attachments.

Steps To unlock Bootloader:
  • After installing Gordans Gate and the flashtool Turn off your phone.
  • Download SE Tweaker Tool also Mirror[Mediafire] and unzip it.
  • Run SE_Tweaker_Tool.exe from it.
  • NOTE: If no flashtool download from the dialog box appeared after running unlockbootloader.exe
  • Turn off ur phone
  • Select unlock_bootloader button.. run S1tool button to check if the your phone has SIM UNLOCK CERTIFICATE.[i.e click on "Do" in s1tool and compare the output]
  • Boot your phone into flash mode (make sure you installed Gordon's Gate and usb debugging is on). All users, press and hold back button while connecting cable from PC to phone. Continue holding back button until you get some output. The LED on your phone should flash green if it is in flash mode.
  • Click on how it should look.. it will give u an idea how the output will be..
  • NOTE- At this moment you should know if you have SIM UNLOCK CERTIFICATE or what ever the output was.. keep that in mind.. 
  • Now disconnect[/COLOR] your phone n boot it up.Connect it again to PC (make sure your USB DEBUGGING is enabled and antivirus is disabled) 
  • Now click the check box which is right for you [Read them carefully it will be according to the output you got with s1tool] run the corressponding button.. 
  • After it proceed to check if the unlocking of bootloader was done by clicking Check If your "Bootloader is unlocked And Proceed" button..
  • Reboot your phone to flashmode as before.. Run s1tool.. N compare the output.. 

If the line RUNNING S1_EROM FROM VER "#8A02$" has a lowercase "r" letter replacing the "#" (RUNNING S1_EROM FROM VER "r8A02$"), your bootloader has been unlocked . If it has an uppercase "R" replacing the "#" (RUNNING S1_EROM FROM VER "R8A02$"), your bootloader is NOT unlocked.


Re-locking the Bootloader Follow the steps in the Tool

DOWNLOAD THE KERNEL WHICH YOU WANT
[Note: If it is downloaded in *.zip or *.rar format just open with any zip tool like Winrar or 7zip tool n extract the *.ftf file to your drive n later put in into the /firmwares folder of flashtool and follow below steps to Flash]

How to flash custom kernels:
  • Put the *.ftf file in the /firmwares folder. ( flash only the .ftf file.)
  • Open Flashtool.
  • Click Flash.
  • Select (kernel name).ftf.
  • Turn off your phone.
  • Connect your phone in flash mode (only when the popup window prompts for you to do so). (To boot into flash mode, press and hold back button while connecting your phone to the PC using an usb cable).
  • Disconnect your phone (do so only when the popup window to prompts you to disconnect your phone).
  • Reboot and you have a custom kernel! 
  • Confirm by going to Settings --> About Phone --> Kernel version. It should have the name of the kernel you flashed.
To flash back to stock kernel, download the file here and follow steps listed above.

Advantages and Disadvantages of Rooting Android Devices


For those who buy Android devices, such as Samsung, Sony Xperia, HTC, LG, etc may may seems confuse to hear such a word of Rooting OS Android devices. I think it is oke the word may seems strange and need a little explanation. On this article i will explain a little about what is the meaning of Rooting, the advantage of it, and the disadvantage you should know before making decision of rooting the devices.

What rooting does: 
Rooting your phone does a number of things. It lets you get Superuser access to your root directory (where you can customize things like appearance or performance). It also allows you to flash(flash is rooting terms for install) a different kernel, optimized for the ROM of your choosing.

Advantages of Rooting Your Android:

Run Custom ROMs
ROMs are what I referred to earlier as the developers overtime. They create their own version of Android, a new Operating System, that customizes your smart phone experience. It can change the color of your icons, change the app dock, whether or not you have an app menu, etc. It can do basically anything. With a ROM you can uncap the full potential of your phone.

Installing Special Apps
There are a number of apps on the market that only work while rooted. Screenshot apps, overclocking apps, etc. Just by rooting you are able to do so much more in the Market.

Free Internal Storage
People who have low internal memory can transfer any application from internal memory to SD card after rooting their phone. There are some applications that provide the option by default. But if you want to force move an app by creating a symlink, you must use an app that only works on a rooted phone. So those were about the merits. Nothing’s perfect and there are certain caveats associated with rooting an Android device.

Speed and performance 
Kernels are the things that tell your processor what to do, and how to do it. By changing that, you can change your processor speed and voltages. Meaning you are able to do what you love to do, only faster.

Looks
If you have the latest and greatest Android smart phone, you can't deny wanting eye-candy. It's your desire, and the reason you enjoy Android so much. When you root, you can take any imperfections out. If you think it would look better with a blue theme instead of a green one, or you want your favorite color everywhere, you can do it. If you don't like the default layout of the phone, or the styling, you can change it too. You can even make it look like an iPhone. (Though I wouldn't know why you would.)

Customization
This ties into the looks and speed and performance sections. Being able to say that no one around has the same phone as you is nice (iPhone users reading this don't know what it's like). But the moment when you do see someone with your phone, and you can still say your phone is different, is priceless. It gives people warm fuzzies inside.

Disadvantages of Rooting Your Android

Your Phone Might Get Bricked
Not to demotivate you here, but when I tried to root my first Android phone – Samsung Galaxy S – I bricked it and it was in the service center for next 15 to 20 days. No matter how good a rooting tutorial is, it’s a daunting task and if you miss out any step or flash a corrupt zip file (that’s what happened to me) you might end up with a bricked (broken) phone.

Now assuming that you are not a power user, you will have to go to your phone manufacturer’s service center and get your phone fixed. Moreover, if they come to know that the brick or semi-brick has caused because you were trying to root your phone, you might as well be charged for it.

You End up Voiding Phone’s Warranty
As soon as you root your phone, you void your phone’s warranty and if anything happens to your phone even when it’s in the warranty period, the company is going to charge you for the repairs. In some of the phones, you can un-root your phone, but in most of the phones there’s is no going back.

How to Root Haipai Noble i9220 MTK6575 Android 4.0 Ice Cream Sandwich [Tutorial]

How to Root Haipai Noble i9220 MTK6575 Android 4.0 Ice Cream Sandwich [Tutorial]


Haipai Noble i9220 is another great chinese device which looks like Samsung Galaxy Note. I posted about the review of this phone last time here. But we have to remember all andorid devices should be rooted first before the owners can enjoy the full abilities using their phones. This rooting procedure also applied to this chinese great phone Haipai Noble i9220.

On this post i will explain about how to root Haipai Noble i9220 with Android 4.0 Ice Cream Sandwich step by step, so you can follow the intruction below carefully:

Note:
  • The instructions in this guide are intended for use with the Haipai Noble i9220 MTK6575. Applying these instructions on another device or model may produce undesired outcomes.
  • The information in this guide is provided for instructional and educational purposes only. There is no guarantee that these instructions will work under your specific and unique circumstances.
  • Use these instructions at your own risk. We shall not hold any responsibility or liability for whatever happens to you or your device arising from your use of the info in this guide.
  • Read and understand the whole guide first before actually performing the instructions.
  • This Procedure works for Mobiles having stock ROM only, and will definitely void your warranty, although the warranty can be claimed by un-rooting your device.

What you need to prepare:
  • Haipai Noble i9220 MTK6575 and a PC
  • Backup all personal data on your phone to make sure you have a copy of your personal data (e.g., contacts, SMS, MMS, Internet settings, Wi-Fi passwords, and the like) in case the procedure in this guide erases such data. Guide from here
  • Make sure your device has at least 75% of phone battery charge.
  • Download this file here. (which is including: vold.fstab, Mtk6575 USB Driver, latest flashing tool and the firmware as well as a root file FOR HAIPAI I9220 ONLY)

Steps to root Haipai Noble i9220 MTK6575:
  • Please download root file from the link above.
  • Go to settings-developer options-click USB debugging.
  • Connect the phone with computer,turn on usb device.
  • Click the file you download from the link TPSparkyRoot.bat
  • Your phone will restart first time,after the phone start finish(until you see the unlock),click enter in the window of TPSparkyRoot.bat.
  • The phone will restart second time,still the same as first time we did.Then start third time,same as we did in last two times.Click enter then phone was rooted.
  • You will see two more app was installed in your phone that means root phone successfully.

After successfully rooted, it will install root explorer.apk Chinese version which is rather useless for installing Market because it's all in Chinese. Thus, you need to download this "ES File Explorer" in order to put Google Play into the system folder. People who have a problem when installing Google Play by using apk, for example: Error processing purchase [DF-BPA-13]


Here is how to install a new and working Google Play Store:
  • Download "Vending.apk" from the same 4shared folder above. 
  • Copy Vending.apk to \system\app\ folder in your phone by using ES File Explorer in root explorer mode with system file mounted.
  • Change permission of Vending.apk to Read/Write for Owner; Read for others (rw-r--r--)
  • Shutdown your phone.
  • Switch on your phone, you will see Google Play Store app, and Enjoy !

Haipai I9220 Noble Reviews: A Samsung Galaxy Note Clone Only $172.99

Haipai I9220 Noble (4 Stars out of 5)


Well, maybe it’s not simply about a tight budget any longer, to my understanding, most of those new brand smartphones are more or less politically over-prized. Yes, you are definitely right in saying that Chinese phones are not all junk, especially today – since they have been improved quite a lot during the last couple of years. Unless there is a strong need, why spending a fortune on something which is more or less outdated a year later on?

Specification:


CPU  MT6575 1Ghz CPU + 800 MHz GPU
OS Android 4.0 Ice Cream Sandwich
Language: English, Arabic, French, German, Indonesian, Italian, Malay, Portuguese, Russian, Spanish, Thai, Turkish, Vietnamese, Traditional Chinese, Simplified Chinese, others
Memory RAM : 512MB / ROM : 4GB
MAX support 64GB Class 12 Micro SD Memory Card (TF-Card)
Size 147 × 86 × 9.7 mm
Weight 165 g
Screen 5.2-inch Capacitive multi-touch screen (5 points), WVGA PX: 480 x 800, 16 Million Colors
Network Dual SIM Dual Standby, supports W+G or G+G
2G:GSM/EDGE/GPRS 850/900/1800/1900MHz
3G:WCDMA/HSPDA 850/2100MHz
Supports GSM service all over the world
Color Black
GPS Built In GPS, supports voice navigation
Connection Bluetooth with EDR & A2DP
Wi-Fi : IEEE 802.11 b/g/a, WiFi Hotspot functionality, Tethering & portable hotspot
Micro USB 2.0
Camera Dual Camera
Back 5.0 Mega Pixel with Auto focus and Flash LED
Front 0.3 Mega pixel
Video playback and recording, supported formats: 3GPP, MP4, 720P(1280 x 720)
Sensor Gravity Sensor, Proximity Sensor, Light Sensor
Radio FM
Video AVI , MP4 , FLV , 3GP , MOV , ASF , MPEG , RMVB , etc.
Audio MP3 , AAC , WAV , etc. / 3.5 mm Audio Jack
Special functions Gravity Sensor, Proximity Sensor, Light Sensor, FM Radio, Wifi, GPS, Multi-touch Capacitive Screen, Dual SIM, Schedule Power On/Off, Handwriting
Battery and Accessories - Li-ion Batteries 2800 mAh
- Earphone / 3.5 mm Audio Jack
- USB Cable


Photo:


Display:
A positive experience – or, just right:

1. The actual density means objects are not as small as on screens with a very high density, the number of dots per inch (DPI), well, even this numer of pixels is displayed on a 5.2″ screen, there is no low density ‘pixel-effect’ which I feared having to live with (e.g. emails on my old HTC Wildfire v1 are hard to read because of the low density of the Wildfire display). On my LG E900 emails along with other objects were hard to read because objects were simply too small due to the same number of pixels on a 3.8″ screen, the density was too high.

2. Brightness is good, adjustable in three levels, or automatically controlled by the system.

3. Viewing angle may not be as perfect like the original Samsung Galaxy Note but it is very good from horizontal angles from side to side, if the device is held in normal vertical position and several people are looking at the screen; the vertical viewing angle is mainly good between center and low, it weakens when looking from top, but this is an unnatural viewing position anyway.
4. The number of colors is not an issue here (some [older] Chinese smartphones are reported to provide a poor display experience in this respect).

Performance:
One word – GREAT! For any task the best experience so far. Playing games is not my cup of tea, please watch YouTube videos for a demo of game performance on that single core CPU/GPU couple. When everything is so fast, then the start of the camera App seems a bit slow, but still Ok with around 3.5 seconds.

Power consumption:
Very good in comparison, the battery lasts almost two days including polling three email accounts, one calendar, several phone calls, some browsing. Sure, when driving for hours and additionally providing tethering for my HTC which I use for navigation plus data (GPS see below), then I have to recharge in the same night.

Memory:
To my surprise it came with a fixed built in SD card of 2GB size. There is, however, a slot available for inserting an extra micro SD card. About the size, I am using a 16GB card class 6 but I read about people using a 64GB card. The interesting thing is, that when connecting to a computer, both SD cards are presented separately, a reasonable usage might be i.e. the 2GB rather for internal use, the additional one for large media like music and photo collections.

Dual SIM:
Works as expected, this is a required feature in China due to the sheer size of the country and the resulting gaps of network coverage. Only one SIM card can be assigned as the 3G data carrier (high speed data), but this can be switched thru settings though, no need to open the phone and swap the SIM cards physically. Sending of text messages can be assigned to one or the other SIM card, the setting is kept as the default. Making phone calls, I keep the setting to choose the SIM every time I want to make a call, however, a default SIM can be defined, without asking every time. The network name (and the color) associated with a SIM card can be edited. In the list of recent phone calls and practically everywhere the used SIM network is displayed, you always know which SIM was or is used for which phone call or test message. Unless there is a phone call currently going on, the phone is ALWAYS listening standby on both SIM networks for incoming calls and text messages. (using both SIM cards for actually making phone calls at the same time is not possible, technically it would be, but to my knowledge only with very high power consumption)

Cam:
The picture quality of the 8GB camera is Ok and the Cam is offering many nice settings, however, do not expect the same resolution like an original Samsung Galaxy smartphone, which is another price tag. In reviews about other China smartphones I read about setting the 8GB Cam to it’s native 5GB resolution would improve the quality. This doesn’t seem to be the case here. The 8GB setting is still giving the best results, well, just my results of a few minutes trying a few settings.

GPS:
So far, all comments I read on smartphones coming from Chinese producers are rather negative on the GPS capability, this device is no exception.

GPS Apps I’m using:
‘GPS Status’ by EclipSim turned out to be very helpful on Android phones, I run it to get a fix before I’m using e.g. Endomondo; RunKeeper works very bad on the Haipai, whereas Endomondo works quite well, so GPS quality even depends on the used application.

Walking:
GPS basically works, it takes just around a half minute for the fix, then works halfway as good (subjective impression) as other (brand) smartphones I have been using (LG Win7 E900, iPhone 3GS) and still use (HTC Wildfire v1). So, while my HTC does a quite accurate tracking of within 10 meters, the GPS tracking on the Haipai does the job as well but jumps around from time to time. When looking at the track later on, it seems like not being accurate within the range of 10 to 50 meters, only roughly useful.

Driving:
When using the Google Navigation App, it’s possible to navigate and the big screen makes it a pleasure to look at, but due to occasional jumps and off-road tracking it can be a challenge to deal with.

GPS data fix:
The Haipai GPS settings are offering a download of ‘EPO assistance data’, the download worked, no idea how to test, and no time, sorry.

My personal GPS solution:
Since all the networking including tethering works like a breeze on the Haipai I’m setting the Haipai to ‘tethering’ along with ‘keeping this mode’, then I connect my HTC Wildfire thru WiFi and use that for navigating and tracking, for walking and driving. The additional advantage of that solution is to still have the Haipai free for any other tasks, including using it’s own GPS with a map, making phone calls, etc., just WiFi is not working of course, since this feature is used the other way around: the Haipai is set as a WiFi hotspot during that time.

Size, handling and weight:
The weight and the shape of the device feels good and balanced. For an average size of hands, single hand operation is possible, i.e. moving an icon, starting an application, opening a mail. It fits a shirt pocket with the flip cover mounted, but barely any space left, for that 5.2″ screen device I wasn’t sure about that. Since it comes with a normal back cover and with a flip cover, one can choose among them. I’m using the flip cover which I feel is more protective during a working day.

Screen protector and sensitivity:
I placed the included screen protector which improves the touch experience, I did that after trying to touch and swipe without the screen protector which felt slightly sticky, especially swiping works much better with the screen protector. Some cleaning spray and good light conditions are important before placing the screen protector. With the power supply connected, the display sometimes can ‘feel’ a bit oversensitive and another app gets selected than the one you are touching, this is a known effect also from other smartphones, and it also may depend a bit on how the device is hold in the hand.

Sound quality:
Both the speech quality and the sound quality of polyphonic ring tones are rather good, on a scale of 0 to 100 where #100 is the best and clear sound I would give a #65. (iPhone 3GS=#30, LG E900=#20, HTC Wildfire v1=#90). One thing: the included head set is of a cheap, humble sound quality which can turn listening to music into kind of a torture after a while. Unfortunately the 3.5mm plug is slightly deeper/longer than usual Western head phone plugs, no time for a solution yet. It may be possible to order a high quality head set thru a Chinese shop …? just an idea. At least, it’s a head set, not just a head phone, so it’s fine for just making – and taking – phone calls in a hands-free fashion.

Important App for Android:
Over the time and when using diverse applications, the working memory of an Android phone is becoming smaller, this can make the device slower or even prevent a certain task which requires more memory than available. Thus it makes sense to use a task manager (like e.g. ‘ES Task Manager’) which is a way to kill all tasks in the background to free memory. In case of the Haipai I initially have a bit over 200 MB free, after using a lot of things it’s getting down to around 80 MB. So, from time to time, or before I’m going to the Google PlayStore to – maybe – install something new, I’m going to kill all tasks first to avoid possible problems caused by ‘not enough memory’.

Conclusion:
Considering the price tag and the overall quality along with the features, one might estimate it’s 75% of the features of a Samsung Galaxy Note while it’s 40% of the price. I personally would buy it again, immediately.

How to Unlocking Bootloader on Sony Xperia W8 Using SE Tweaker Tool (Tutorial)


How to Unlocking Bootloader on Sony Xperia W8 Using SE Tweaker Tool (Tutorial)

After i posted the way to unlocking the bootloader of the Sony Xperia X8 on this post, this time i will explain about how to Unloackig Bootloader of the Sony Xperia W8. The tutorial is a little bit same of the previous tutorial.

SE Tweaker Tool is a Tool + Guide to make some tweaks to ur phone With ease which includes of all the necessary utilities for many devices. Unlocking the bootloader of your phone will restore the original sim lock of your phone (if you had any) unless if you unlocked with EMMA/IMEI unlock code or it was factory-unlocked or if SE unlocked it! However, some users have reported that using msm7227_semc.cmd on their sim-unlocked phones did not restore the sim lock onto their phone.

Read this before doing Unlocking Bootloader

NOTE: Dealing with the bootloader is highly dangerous and can result in a hard brick if you don't follow the proper instructions. Then, you will have to go and repair your phone by sending it to SE. I am not responsible if your phone dies on you because you didn't follow instructions or you screwed up somehow. Unlock the bootloader on your sim unlocked phone AT YOUR OWN RISK!

Only For people getting error related iscoolbutton.ocx.. Just Run the ocx_fix.bat in the downloaded tool and then Run the SE Tweaker Tool..

Requirements: 
  • Rooted phone, Sony Ericsson PC Companion installed in PC, Courage
  • You do not need to have a sim lock on your phone to unlock your Bootloader.

Recommended:
  • Disable your Antivirus (it might find a "virus" in ADB.exe even though there isn't one and might even interfere in bootloader unlocking process) 
  • USB debugging enabled.

Download the files needed for the unlock.
  • Download Flashtool (needed for S1tool to work properly and for loading custom kernels next time) and install it (not necessary if you already have Flashtool):
  • Download and install Flashtool v0.5.3 here (follow instructions on the website).
  • After installing it, open the flashtool folder and open the drivers folder inside that. Double click on the ggsetup-2.2.0.11.exe file inside and install Gordon's Gate.
  • Then restart your computer. if you dont Find GORDAN'S gate.exe in the drivers folder download it from my attachments.

Steps To unlock Bootloader:
  • After installing Gordans Gate and the flashtool Turn off your phone.
  • Download SE Tweaker Tool also Mirror[Mediafire] and unzip it.
  • Run SE_Tweaker_Tool.exe from it.
  • NOTE: If no flashtool download from the dialog box appeared after running unlockbootloader.exe
  • Turn off ur phone
  • Select unlock_bootloader button.. run S1tool button to check if the your phone has SIM UNLOCK CERTIFICATE.[i.e click on "Do" in s1tool and compare the output]
  • Boot your phone into flash mode (make sure you installed Gordon's Gate and usb debugging is on). All users, press and hold back button while connecting cable from PC to phone. Continue holding back button until you get some output. The LED on your phone should flash green if it is in flash mode.
  • Click on how it should look.. it will give u an idea how the output will be..
  • NOTE- At this moment you should know if you have SIM UNLOCK CERTIFICATE or what ever the output was.. keep that in mind.. 
  • Now disconnect[/COLOR] your phone n boot it up.Connect it again to PC (make sure your USB DEBUGGING is enabled and antivirus is disabled) 
  • Now click the check box which is right for you [Read them carefully it will be according to the output you got with s1tool] run the corressponding button.. 
  • After it proceed to check if the unlocking of bootloader was done by clicking Check If your "Bootloader is unlocked And Proceed" button..
  • Reboot your phone to flashmode as before.. Run s1tool.. N compare the output.. 

If the line RUNNING S1_EROM FROM VER "#8A02$" has a lowercase "r" letter replacing the "#" (RUNNING S1_EROM FROM VER "r8A02$"), your bootloader has been unlocked . If it has an uppercase "R" replacing the "#" (RUNNING S1_EROM FROM VER "R8A02$"), your bootloader is NOT unlocked.


Re-locking the Bootloader Follow the steps in the Tool

DOWNLOAD THE KERNEL WHICH YOU WANT
[Note: If it is downloaded in *.zip or *.rar format just open with any zip tool like Winrar or 7zip tool n extract the *.ftf file to your drive n later put in into the /firmwares folder of flashtool and follow below steps to Flash]

How to flash custom kernels:
  • Put the *.ftf file in the /firmwares folder. ( flash only the .ftf file.)
  • Open Flashtool.
  • Click Flash.
  • Select (kernel name).ftf.
  • Turn off your phone.
  • Connect your phone in flash mode (only when the popup window prompts for you to do so). (To boot into flash mode, press and hold back button while connecting your phone to the PC using an usb cable).
  • Disconnect your phone (do so only when the popup window to prompts you to disconnect your phone).
  • Reboot and you have a custom kernel! 
  • Confirm by going to Settings --> About Phone --> Kernel version. It should have the name of the kernel you flashed.
To flash back to stock kernel, download the file here and follow steps listed above.